Tiffany Studios Techniques
- Home
- Reviews
Tiffany Studios - Featured Artist
By Tiffany Studios Techniques
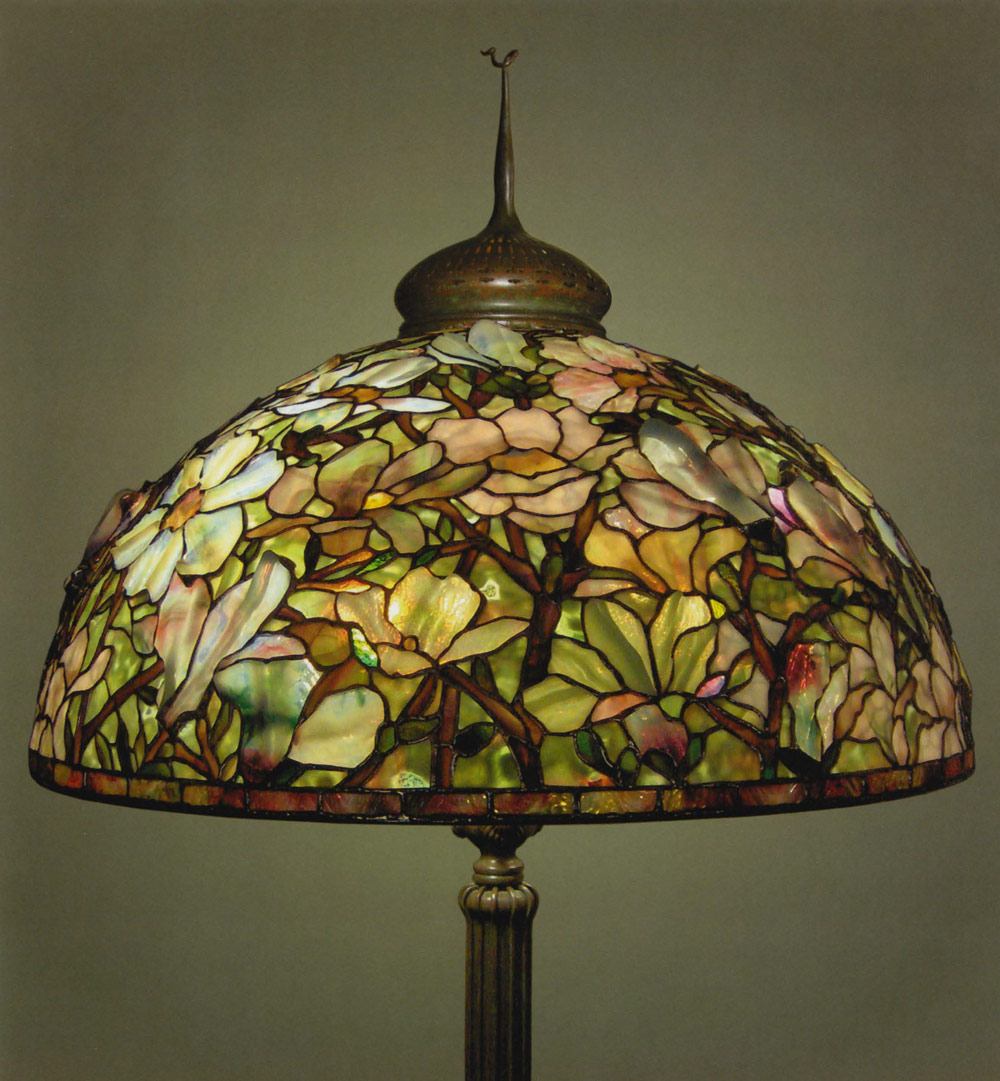 Scott Riggs has a passion for Louis Comfort Tiffany's lampshades and beautiful glass. He has created an impressively beautiful body of work in his California studio using the finest sheet glass made in the past several decades. A lifelong interest in art and a friend's introduction to the art of stained glass sparked his involvement. Scott Riggs, Magnolia lampshade, "This is a 28" magnolia on a Senior Floor Base. Many sheets of drapery glass were hand sawed to complete this labor intensive shade. There is lots of ripple glass and texture throughout this wonderful piece. The background is a rich Oceana light green with hints of cranberry. There is lots of color bleeding in the background also. The buds have green and brown in every piece with little screamers in some. This photo shows some light on the outside as well as some light on the inside." Photograph courtesy of Scott Riggs Tiffanys.
 Scott Riggs explains: "I was always interested in art as a kid and loved to draw and paint. I had a friend a long time ago that knew I could draw and he asked me to draw him a sailboat in a way that he could cut it out in stained glass. I did this for him and I in turn asked him if I could watch him cut the glass. As he threw the scrap glass on the floor I started gathering it up and asked if I could have it. He said sure, then I started arranging it into a collage of abstract glass and I started asking questions about assembly and purchasing tools and materials. The next thing you know I am buying glass wholesale from catalogs. That was tough until I found Hollander glass in Stanton, California. I got good enough with practice making little windows which grew into making bigger windows and then I started getting commissions for jobs. It was difficult doing the installations but I kept at it. Finally I made a lamp shade for myself then people started asking for these and I thought I could market shades easier than big windows. I became obsessed with Louis Comfort and the rest is history. In my opinion none of the other makers of shades could touch the Tiffany Studios designs. I guess we need to give a lot of credit to Clara Driscoll on those designs and patterns."
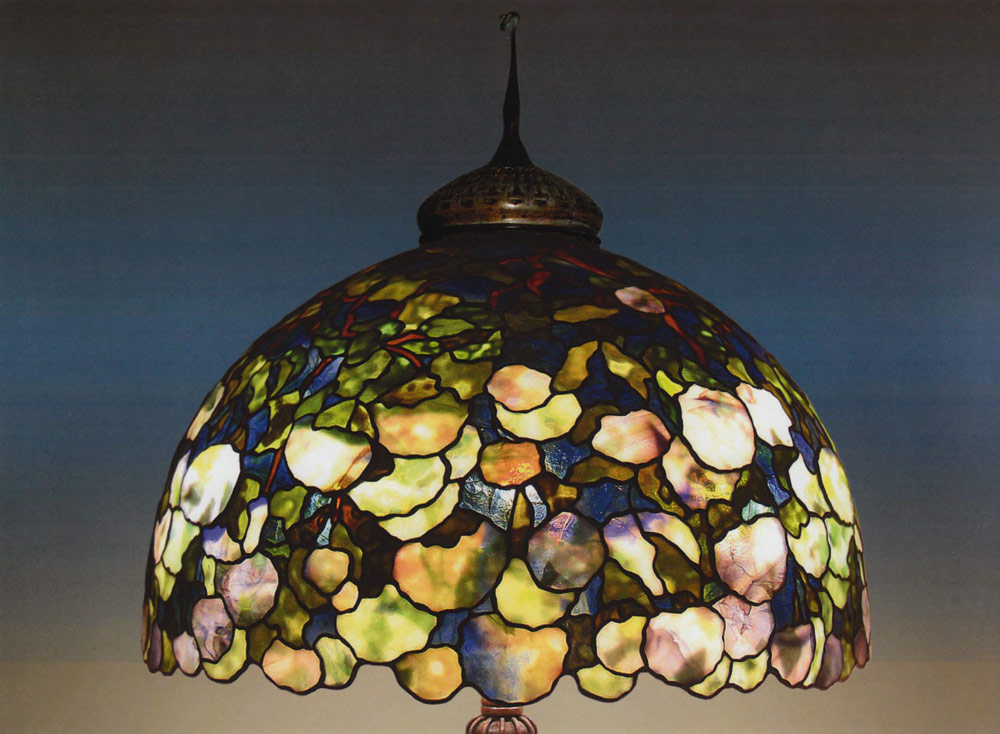
 Scott Riggs, Hydrangea lampshade, "The hydrangea is a 25" diameter shade and was made from confetti glass that I collected for 3 years.
Both the background and all the flowers are cut from different confetti glass so it is also very interesting on the inside of the shade. Many different kinds of mottled greens were used in the leaves."
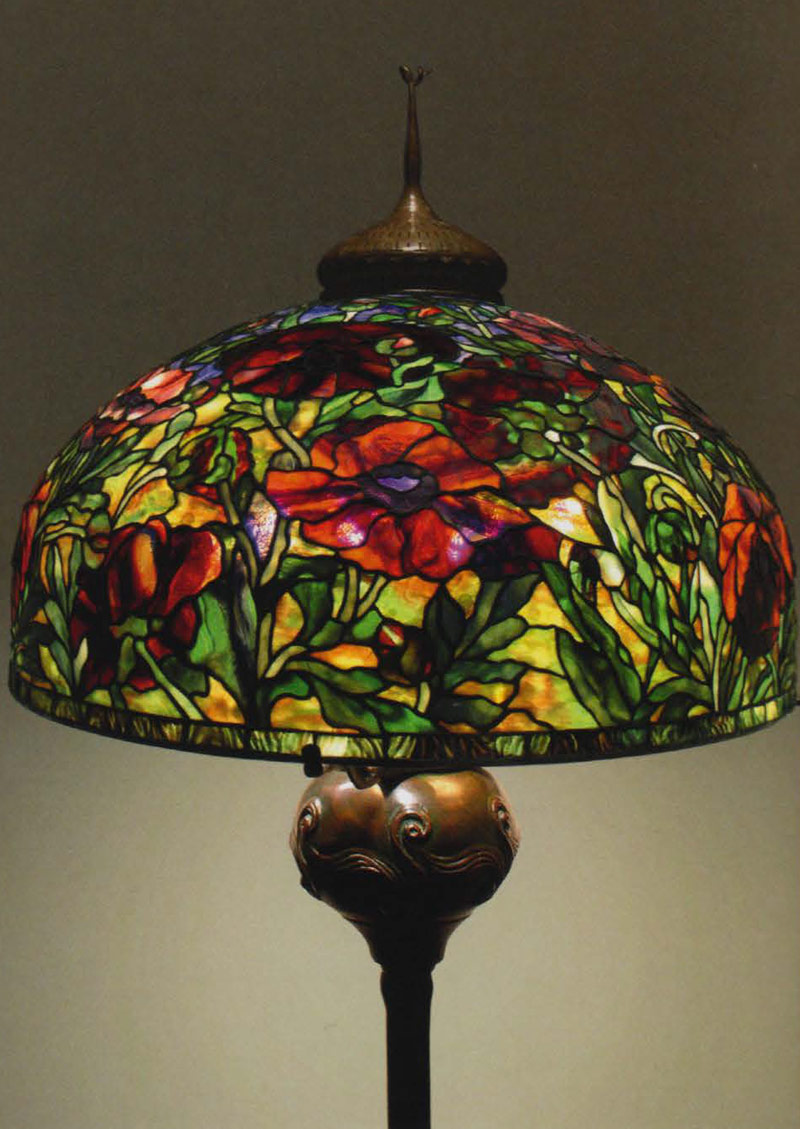
Oriental Poppy lampshade, "this is a 26" Oriental Poppy on an Oil font floor base. This shade had a variation of many types of glass for the flowers and leaves. The background was done in old Oceana glass. Pigtail was from Odyssey." Photographs courtesy of Scott Riggs Tiffanys.
 Scott Riggs, Trumpet Vine lampshade, "Trumpet Vine: This is a 22" Trumpet vine tucked shade with 987 pieces.
Beautiful oranges mixed with a new Uroboros fall confetti glass make up this shade.
Layers of orange and green mixes are used in the leaves.
The base is a Tree Trunk base with a custom teardrop cap with Favrile glass ball."
Photograph courtesy of Scott Riggs Tiffanys.
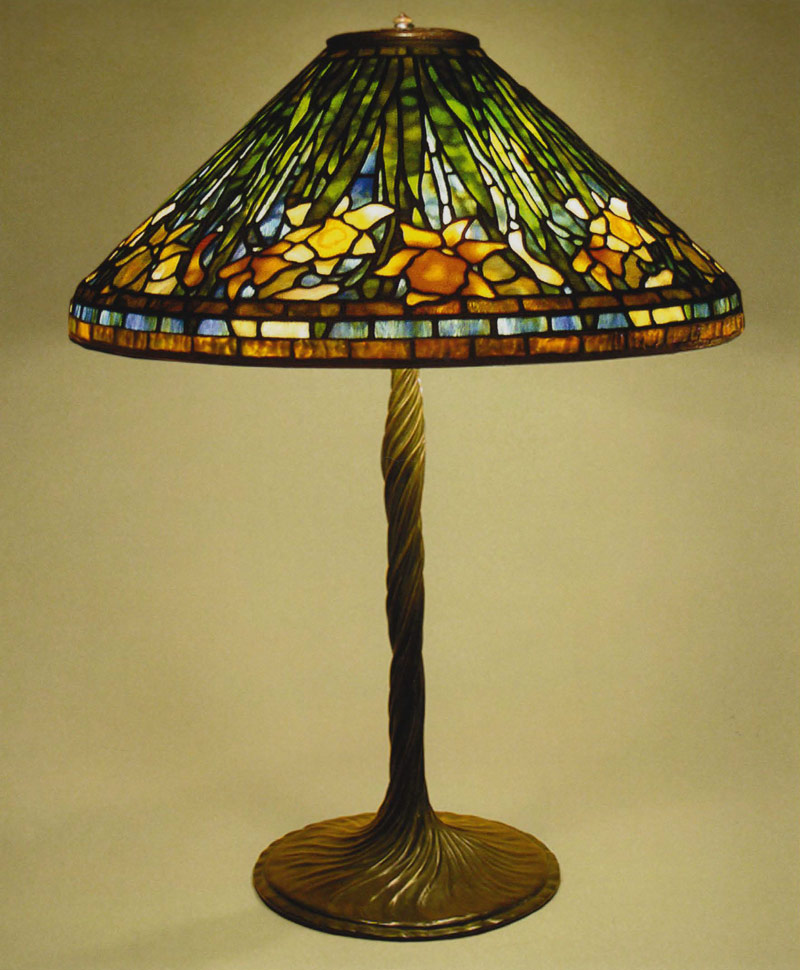 Scott Riggs, Daffodil lampshade, "This is a 20" Daffodil cone. The background has great detail with the major part of glass a nice blue but with the tips bleeding into gold to match the flowers. Rich golds and shadowing make up the flowers. The base is the Twisted Vine base." Photograph courtesy of Scott Riggs Tiffanys.
When asked what captivates Riggs with this technique, his response was:
"I think glass is just magical and so very temporary. It can shatter to bits in a second and people forget about this. When light goes through it, something completely different happens. I have always been an antique lover and I just appreciate the look of glass and wood and stone and bronze. Also I think people take for granted how hard it is to create a painting of sorts, only to do it with glass. I am captivated by the detail and time it takes to recreate wonderful tiffany designs from long ago. It fills my time and gives me a purpose. I love the feedback from my clients and save their emails; they really do enjoy these shades and I think it is a calming effect on people from the busy, crazy lives everybody has today. I still love to stare at shades I made 20 years ago. I still get mesmerized with sheets of glass or certain areas in a shade where I have a mix of colors. I guess it is just what I do and what I enjoy. There is nothing like the feeling of first releasing a shade from a mold and lighting it up for the very first time, even if it is still greasy and waxy. I am usually all alone and study it for about half an hour, then I pat myself on the back, and get ready to start soldering the inside of the shade, usually the next day. I seem to always release shades lace at night because I just cannot stop when I get close. Those are some of the things that captivate me. Another is looking at 100s of sheets of glass on a light table and picking just the right sheets that I love. I spend countless hours just selecting glass and it is not uncommon for me to take over a light box at the glass factory for the whole day."
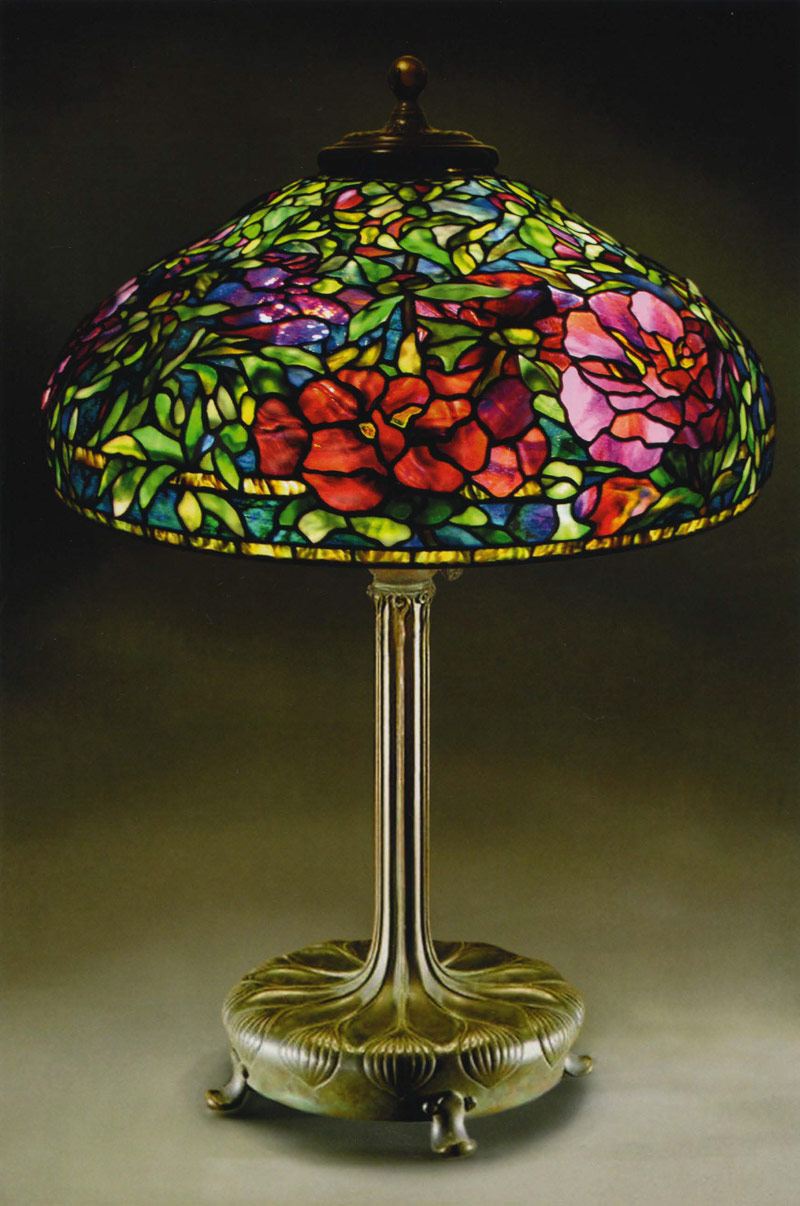 Scott Riggs, Elaborate Peony lampshade, "This is a 22" Elaborate Peony shade with 1038 pieces of glass.
Careful detail went into selecting an array of different glass for all the flowers and buds.
The background is a mix of green and blue confetti glass.
The leaves are Youghiogheny glass with lots of shadowing.
There is Uroboros ripple border rows and the shade sits on a large library base."
Photograph courtesy of Scott Riggs Tiffanys.
 Riggs was asked about discoveries made or unique methods he has created through his years of making lampshades: "I think I make little discoveries and learn new tricks all the time. I am pretty set as to methods of operation and certain little tools and ways of doing all of the processes in making these shades but there are sometimes changes along the way. I think my biggest discovery as far as a tool to help me in my endeavor is a tool for soldering these shades. A friend and I improvised a pull cart used for carrying golf bags into a lampshade or lamp mold holder. It is the mechanism for adjusting the arm that is invaluable. By turning it each notch I can control the angle at which to solder the shade, plus I can spin it either way also. This tool has saved me thousands of hours of soldering instead of constantly propping and moving a shade around, plus this is safer and no pieces of glass are broken. You see photographs of the old artists always holding the shades during their work on them and I do not have to do this. As far as cutting glass, it is pretty much the same as 100 years ago. You score the glass with a glass cutter and break by hand with pliers. Of course we have glass grinders today to get the edges smooch, and we have nice glass band saws for cutting drapery glass or a special inside curve of glass that just cannot be broken away with pliers. These are wonderful modern tools that I do use today at times. Also our soldering irons are much better today and I basically do about 98% of all my soldering with one simple soldering iron. I also have to give credit to Paul Crist (plus all the people from Odyssey at Paul Crist Studios -they know who they are) for all he has done to further the lamp making industry today."
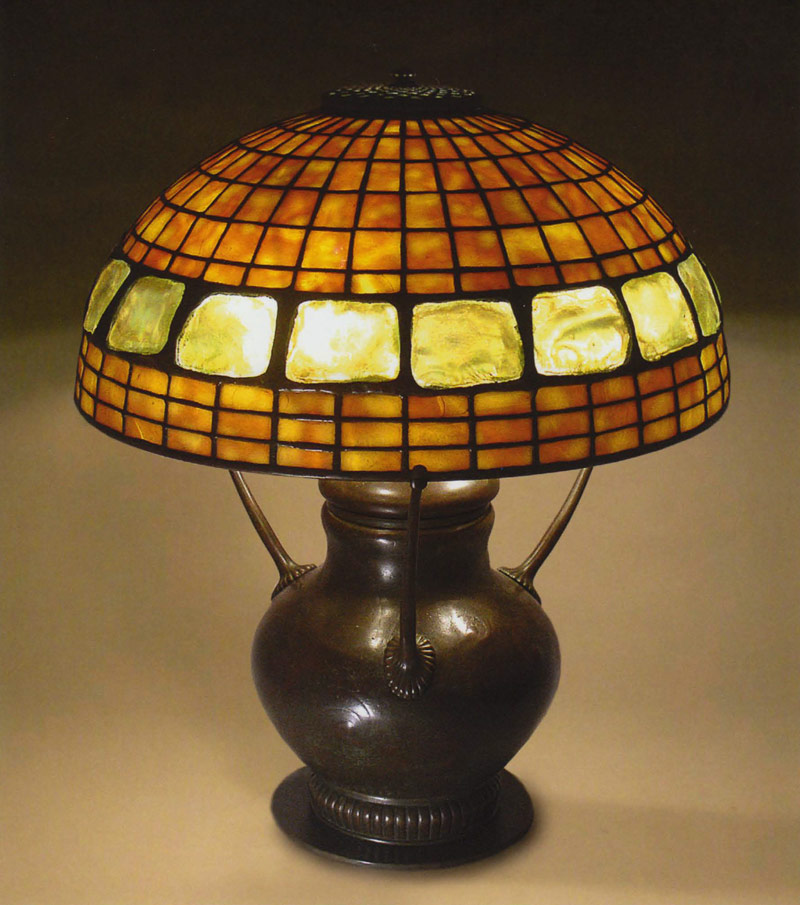
Scott Riggs, Gold Turtleback lampshade, "Beautiful gold mottled glass is used for the grid work of the shade with some rare gold turtlebacks for this 16" diameter shade. Base is complete custom with rich patina." Photograph courtesy of Scott Riggs Tiffanys.
 "Was I familiar with or influenced by Tiffany's techniques:' I would have to say YES, Absolutely, I was influenced by Tiffany's techniques. He had a knack for doing everything correctly and sparing no expense. He wanted the finest bases and the finest glass and he went out and found the finest artisans to help him in his quest. He did not mess around or cut corners. He was a true artist. I feel the same way and try to find some balance in making the finest shade I can with the best and most interesting glass I can get, yet still find a way to make a profit while giving my clients something that will be a true heirloom to be passed on. I would also have to say that the techniques for making these shades are basically the same as 100 years ago in my opinion. You must start with good quality glass and know how to cut it. It must be fit correctly on a mold. Each piece must still be wrapped in copper foil for the solder to have something to adhere to. Then you must solder it all together neatly and smoothly on both sides. The shade must be reinforced with wire to make it strong, the correct hardware must be used and lastly the shade must be placed with a coat of copper so that the correct 'Tiffany Green/Brown' patina may be applied to make the shade look old and authentic. Then when you create a marriage to the right base with your finished shade you have a created a treasure."
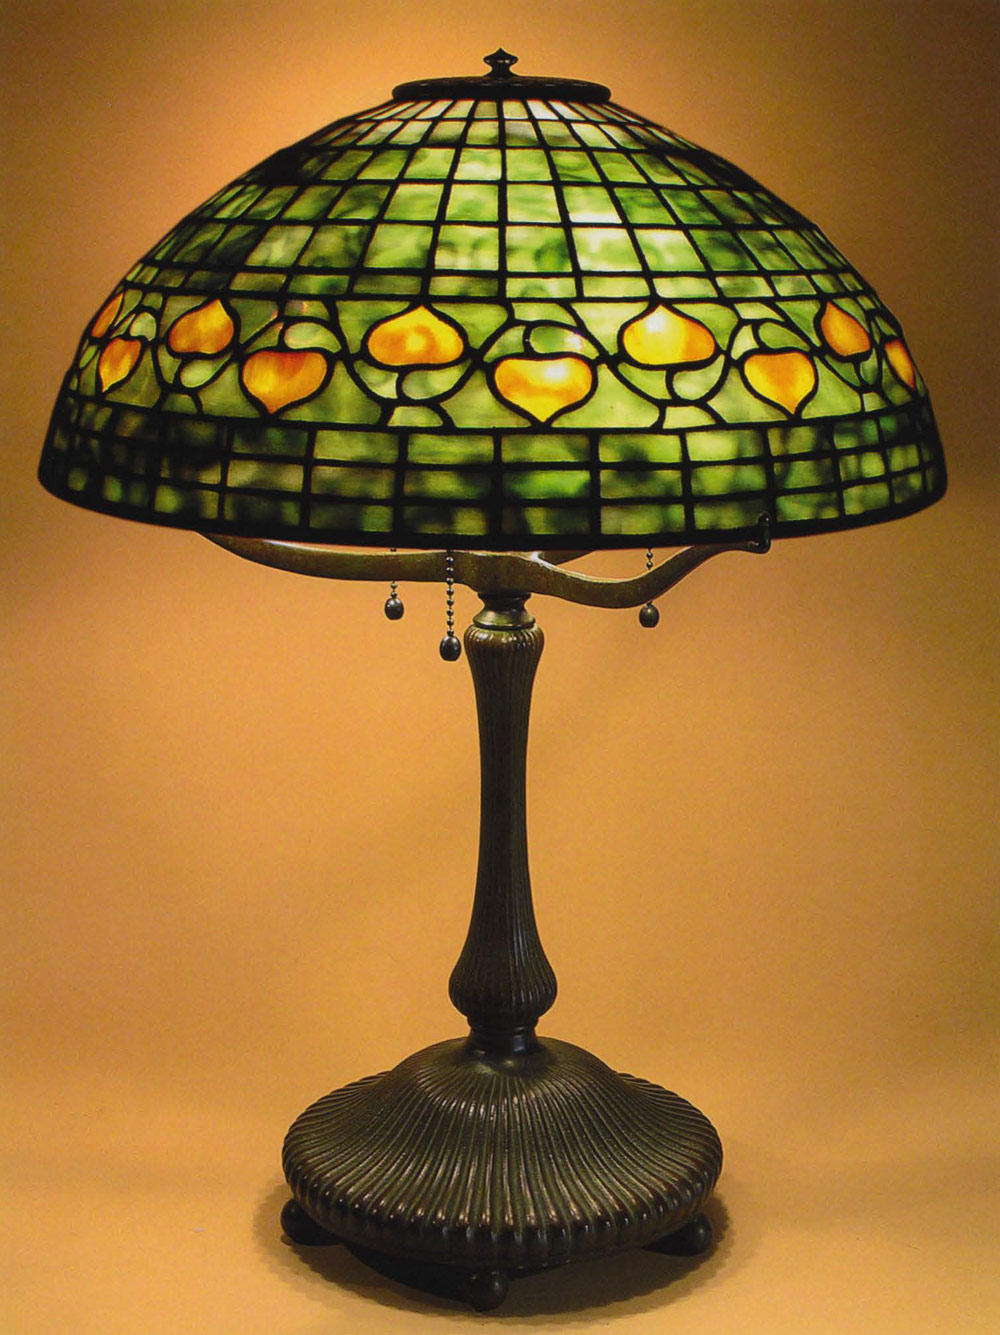
Scott Riggs, Acorn lampshade, "This is a 16" shade with a nice transition from whitish glass at the top fading into a green glass towards the bottom. The base is a ribbed base with arms that the shade sits on." Photograph courtesy of Scott Riggs Tiffanys.
Scott's Creative Production Techniques
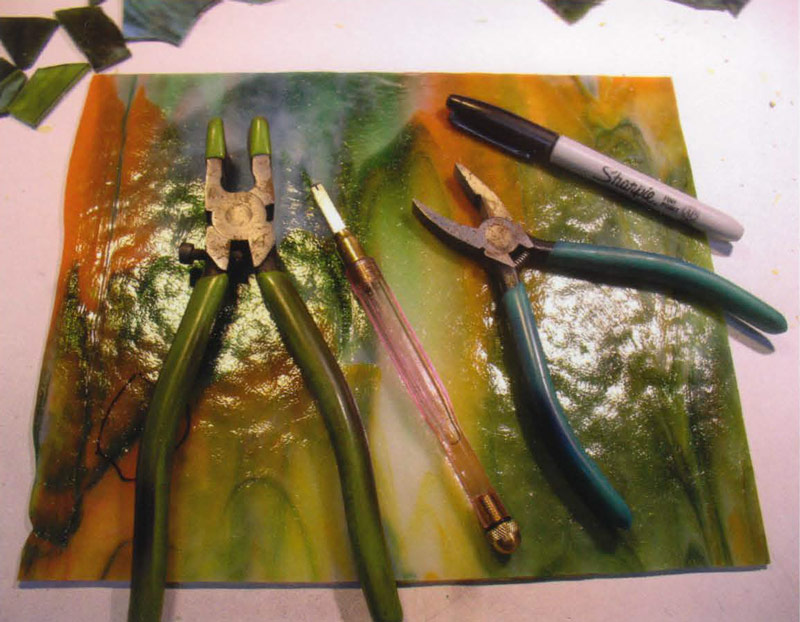 "These are my main tools I use to cut glass with. There is my Toyo cutter which is the finest cutter made today, my grozing pliers that curve, and of course my running breaking pliers to get clean breaks. I use black sharpie pens on light glass and silver or white sharpie pens on dark glass. I also use a glass saw from Taurus (Taurus 3 ring saw) to cut some special cuts or heavily textured or drapery glass. The edges of each glass piece are ground using a Glascar grinder to assure the best fit and prior to foiling. "
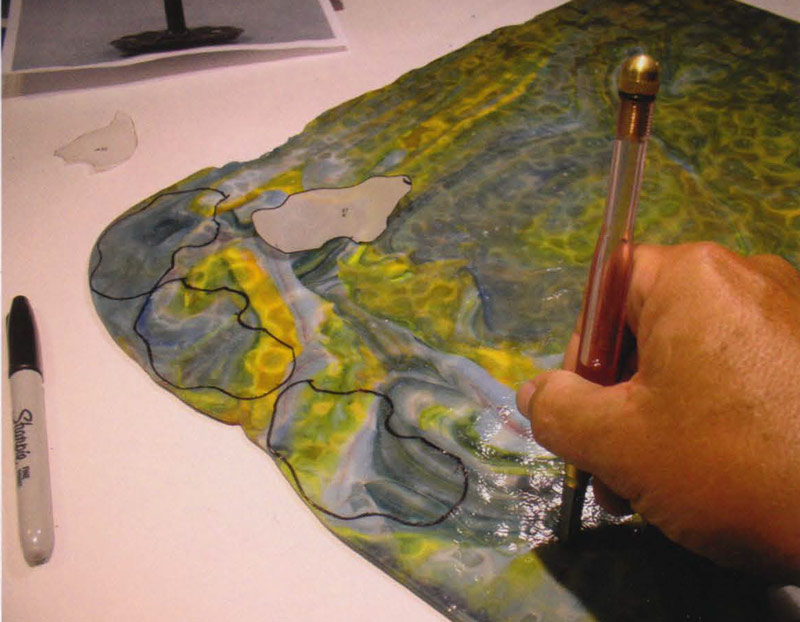 "Three pieces of a leaf have been drawn with sharpie pen on an old piece of mottled glass. I used the end of the sheet where there was more movement in the glass and to save as much of this precious piece of glass as possible. I am beginning to cut the pieces apart from the sheet, with cutter in hand, then separate each piece and continue to score each leaf before breaking apart with pliers."
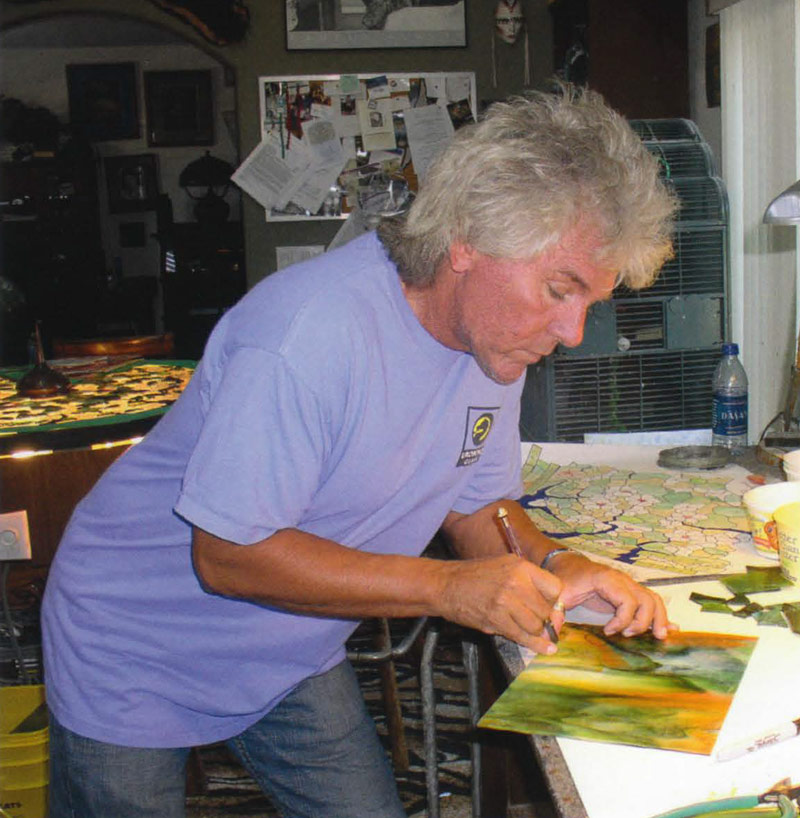 "Here I am cutting a special flower from a small unique piece of Uroboros glass."
"In this photo (below) I have a few of the leaves, and some of the confetti background cut, and laid out on the light table.
This is the beginning and sometimes I work down from the top, but not always.
You can see the lines that were traced from the original pattern of the nasturtium on the clear Duralar sheet."
 Glass and glass cutting tools. Photograph courtesy of Score Riggs Tiffanys.
Detail of glass cutting. also known as "scoring" the glass. Photograph courtesy of Score Riggs Tiffanys.
Glass cutting. Photograph courtesy of Score Riggs Tiffanys.
Fitting glass pieces to pattern on light table. Photograph courtesy of Scott Riggs Tiffanys.
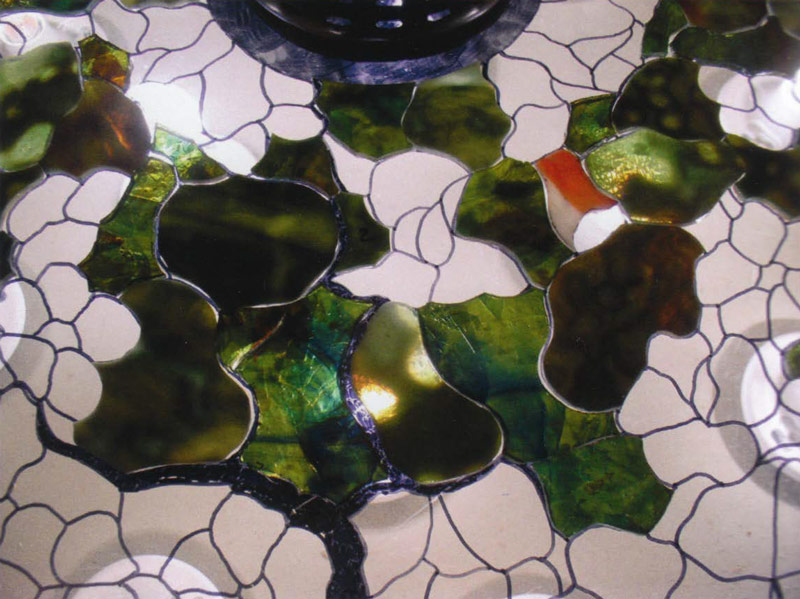
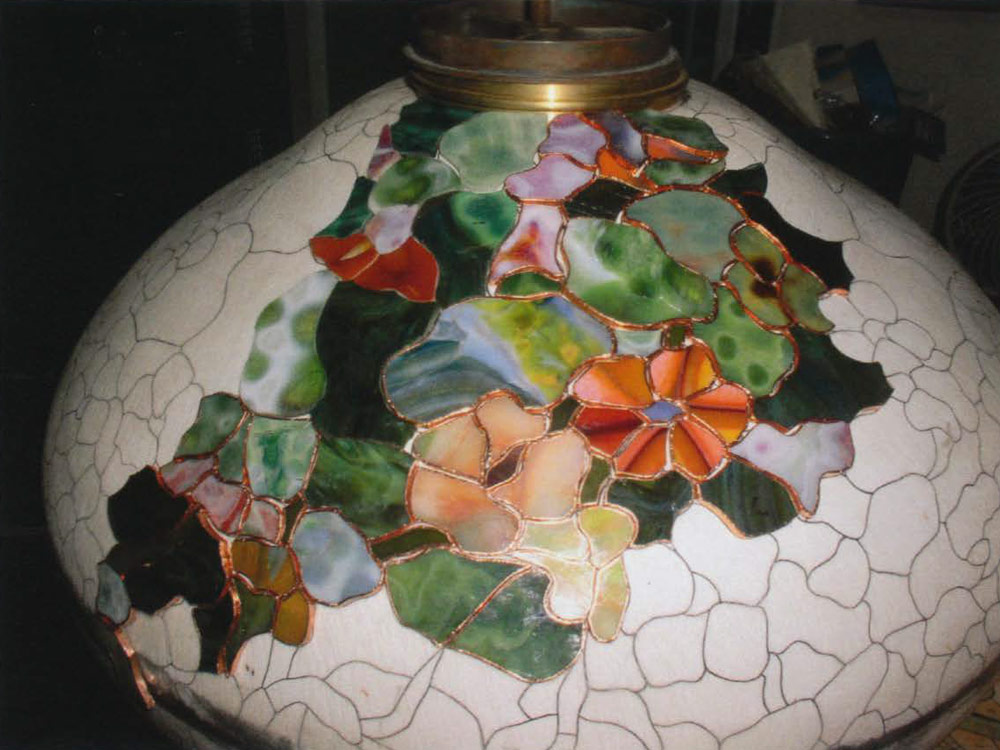
 "Here I have some of the leaves cut towards the top of the shade. I also have the background of different confetti glass cut and laid out for viewing without the lights on in the light table. I like to check color of glass when the shade is turned off also. There is an old Chinese Pigtail cap in the center to just diffuse the light:'
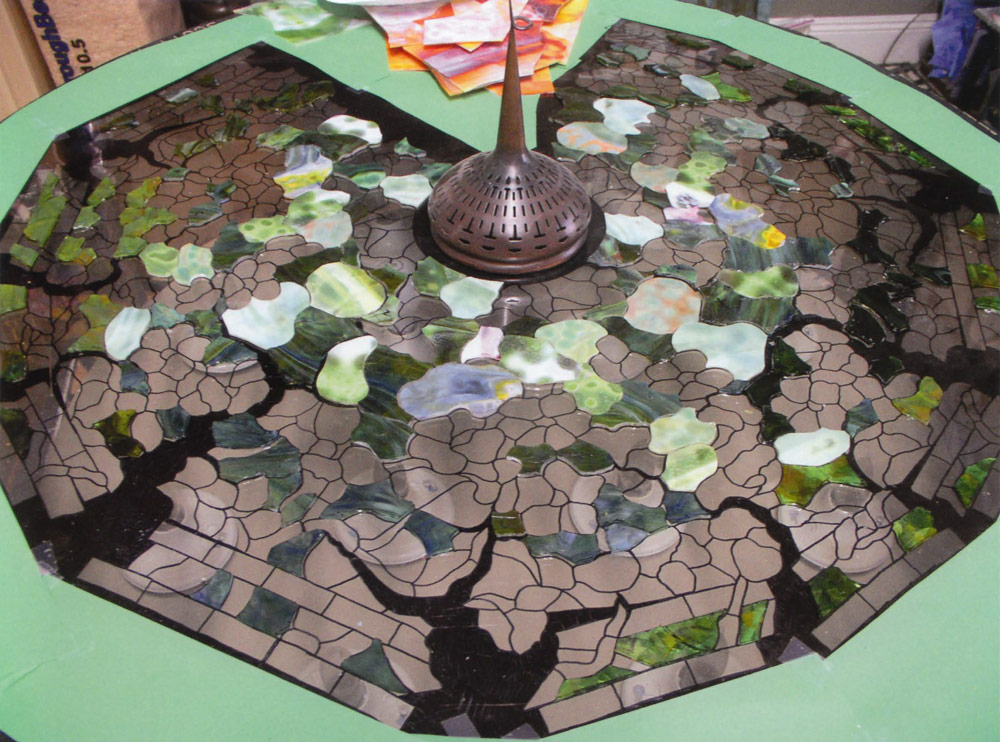
"The complete nasturtium shade pieces have been cut out of glass and are sitting on my huge round custom made light table. 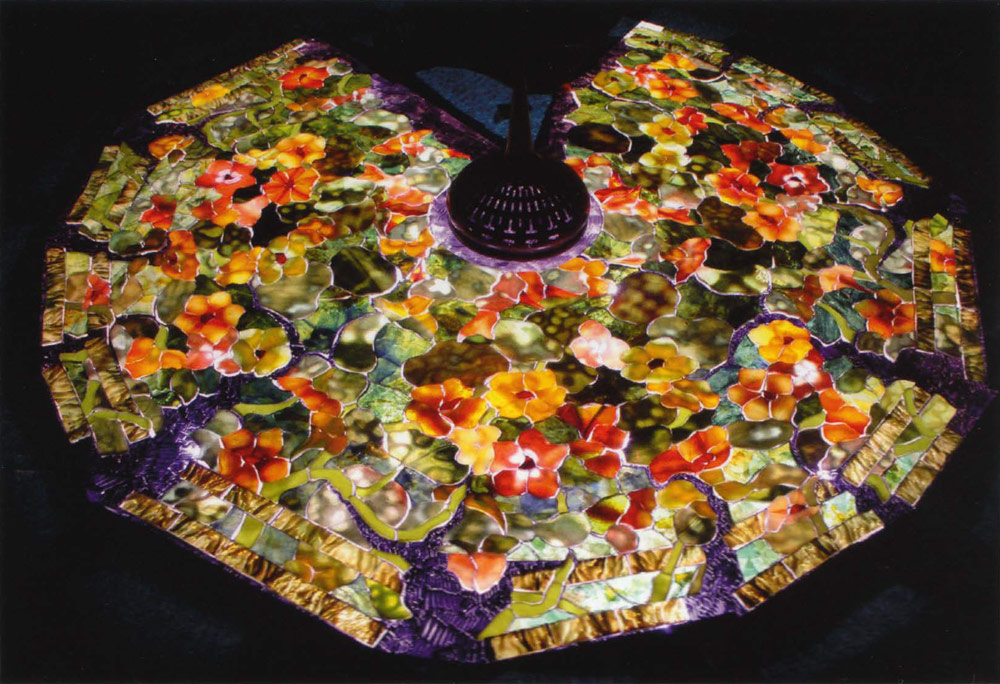 The pieces are sitting on a hand drawn pattern of the nasturtium on Duralar plastic. I have drawn the pattern 3 times with sharpie pen in between the lines for fill in to make it dark. The shade is laid out like this to get a feel for how all the glass blends and to see if there are any pieces I might like to change or re-cut. Once I am happy, I take each piece off the cable and place on the fiberglass mold with tacky wax to check for perfect fit." Fitting and checking glass. Photograph courtesy of Scott Riggs Tiffanys.
Completed curring and fitting of shade pieces. Photograph courtesy of Scott Riggs Tiffanys.
The pieces are sitting on a hand drawn pattern of the nasturtium on Duralar plastic. I have drawn the pattern 3 times with sharpie pen in between the lines for fill in to make it dark. The shade is laid out like this to get a feel for how all the glass blends and to see if there are any pieces I might like to change or re-cut. Once I am happy, I take each piece off the cable and place on the fiberglass mold with tacky wax to check for perfect fit." Fitting and checking glass. Photograph courtesy of Scott Riggs Tiffanys.
Completed curring and fitting of shade pieces. Photograph courtesy of Scott Riggs Tiffanys.
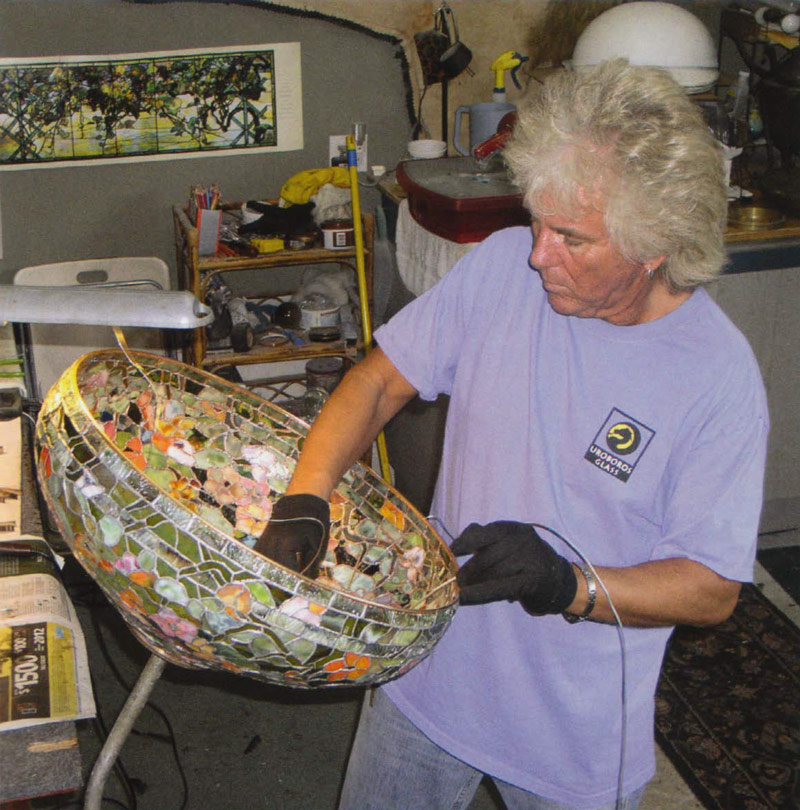 "While I stand and solder the inside of the shade, it is important to always have a level area where you are soldering, to keep the molten solder from dripping or running:·
"Reinforcement wire is used on the inside of the shade and soldered to several solder lines from the top aperture to the bottom rim. There are a total of three wires going from aperture to the bottom rim of the shade."
"Dozens of different kinds of glass were used in this lampshade.
I used Uroboros, Oceana, Youghiogheny, Bullseye and some old antique pieces of scrap glass from long ago. 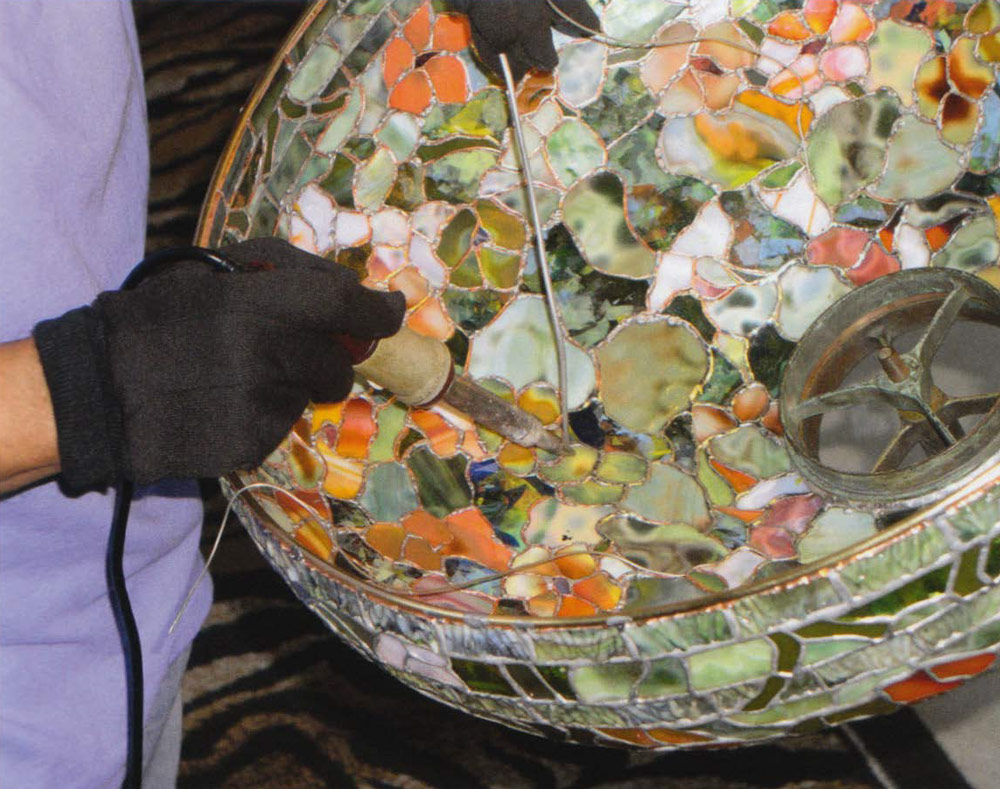 The background was created from about five different kinds of old confetti glass, with lots of blending to get different effects and shadowing as the shade is turned horizontally.
There is gorgeous ripple glass from Uroboros in the border rows of greens and light browns.
There is a heavy ring soldered to the bottom rim of the shade to give a smooth edge and to frame the piece. 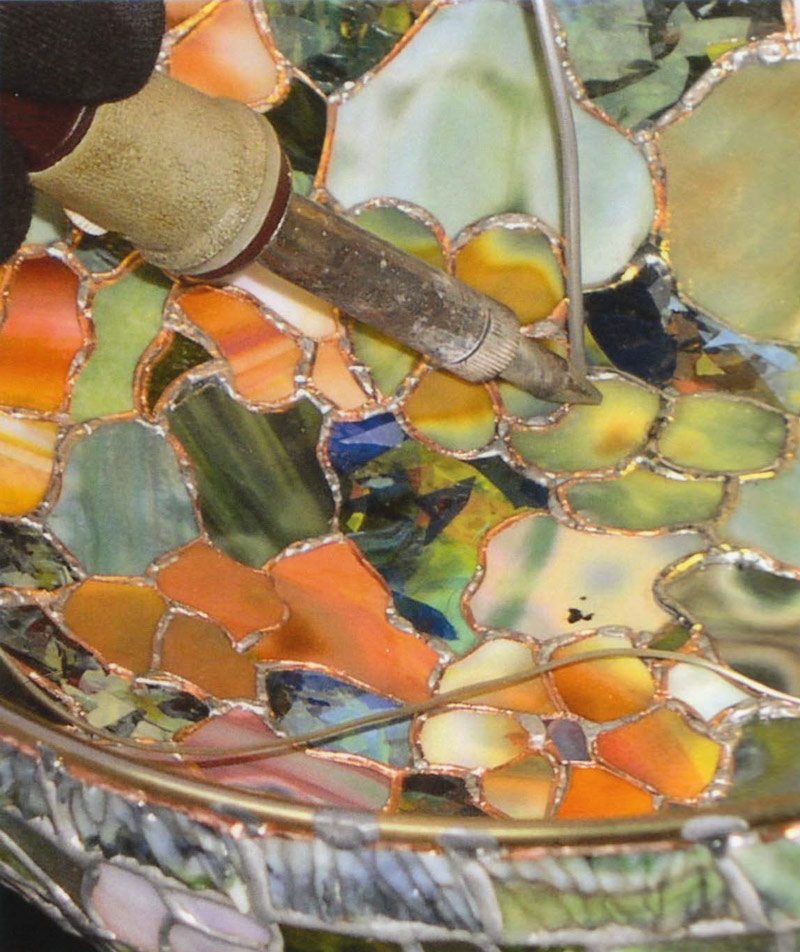
The vase cap is a custom teardrop cap from Paul Crist Studios with the claws holding the Favrile glass ball.
This beautiful floral shade is done in the style of Louis Comfort Tiffany using the Odyssey Lamp System for dome lamp construction."
Soldering lampshade and Soldering reinforcement wires into inside of lampshade. Photographs courtesy of Scott Riggs Tiffanys.
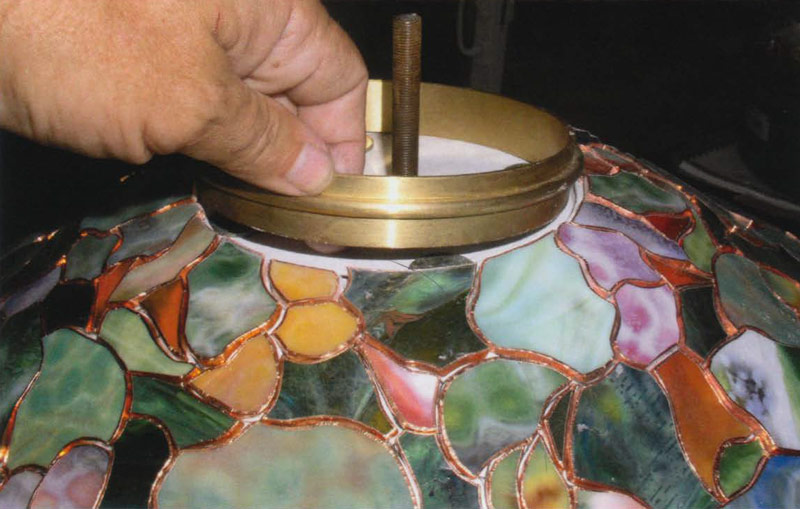
 Here there are some pieces put on the mold with sticky wax to check for fit, then removed, foiled, and put back on the mold. Some pieces have no foil yet. The ring has been placed in the top of the mold to get a perfect fit of surrounding glass. I hold the 5" ring down with a 5" wheel:'"
"The shade is all foiled with copper tape and I am now ready to tack solder the ring. I actually propped the ring up with nickels (or dimes) to see just the right height I like."
 "The soldering at the top section of the shade has been started and completed about 1/3 down from aperture.
I turn the shade constantly to keep it level at all times while I solder the outside. The soldering Iron I use for 99% of my soldering is the Temptrol 100 from Inland."
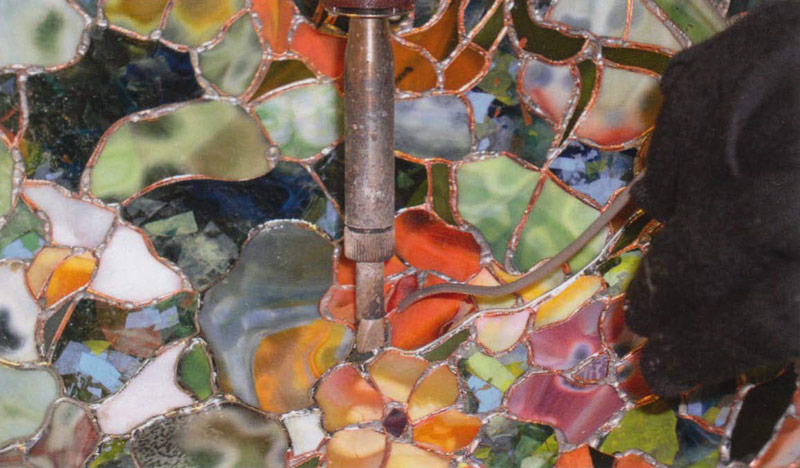 "Solder is being fed into the iron tip while tacking the reinforcement wire.
Then all the copper tape lines will be gone over and smoothed with a nice flat bead of solder."
 Checking glass pieces for fit on mold and adding foiled pieces to mold. Photograph courtesy of Scott Riggs Tiffanys.
Completed foiled pieces on mold with vase cap ring. Photograph courtesy of Scott Riggs Tiffanys.
Soldering lampshade. Photograph courtesy of Scott Riggs Tiffanys.
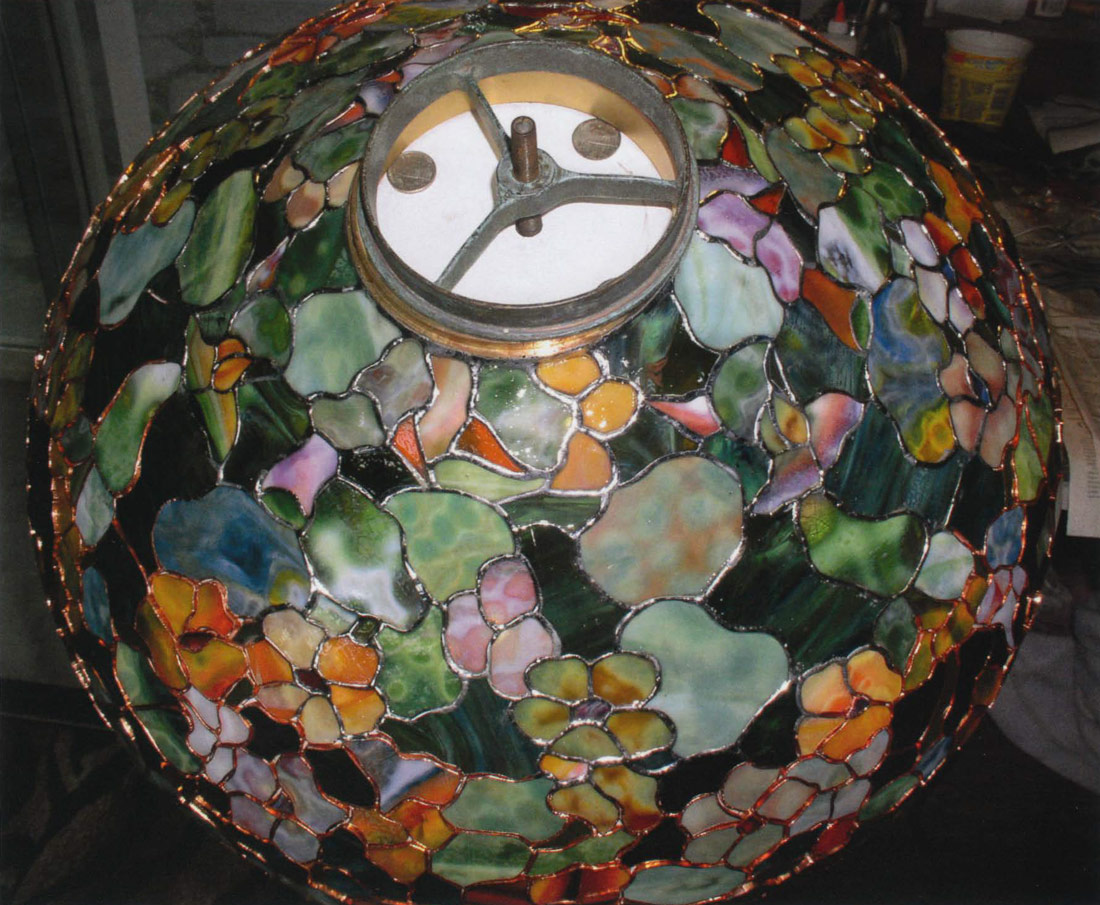
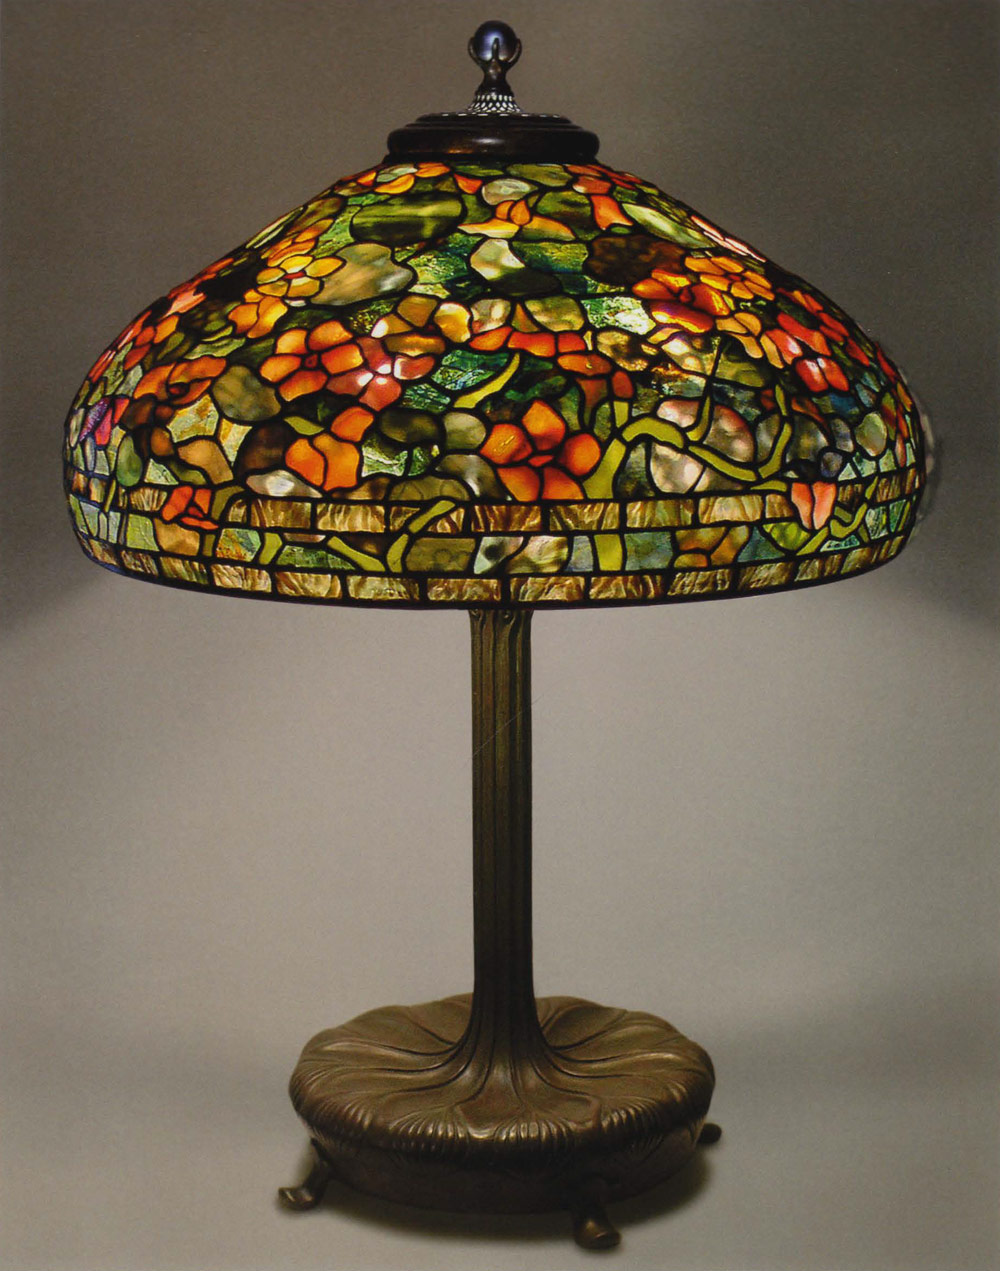 "The completed lampshade is a 22" Nasturtium Tiffany Studios Pattern. The shade rests on a large Library base with a three light cluster inside. It sits on a five inch wheel with a beautiful five inch teardrop cap with claw and Favrile glass ball. This shade consists of 822 pieces of custom meticulously cut glass.
All glass pieces have been wrapped in copper foil, then the whole shade has been soldered inside and out with 60/40 solder.
The final steps are copper plating the shade and applying a beautiful green/brown patina. Then shade was buffed and polished and packed for shipping."
Another lampshade awaits creation in Scott Riggs' new studio space, a 16" Wild Rose with 856 pieces, destined for an eagerly awaiting client.